How to recover lost files ( Linux, Windows, MacOs, Dos, Sun Solaris etc…)

 Most devices should be autodetected including Linux software RAID (ie.
 If available, use raw device
Every single person who is using PC(Personal Computer) are doing some work like monitoring, programming or stores etc. that saves it in hard disk. The hard disk can store any type of data like images, text, multimedia etc. Some times user may delete data accidentally but they need it later on. In these kind of situations, recovery softwares come into play.
The loss data occurs not only by deleting but there are several reasons, and one of them is Hard driver corrupt. In Windows Operating System, we can recover the deleted data by using some useful software tools but this procedure is not possible in Linux.
Computer’s data is not completely deleted from hard drive. It remains somewhere in some form for some time unless the user stores more data by filling up the space. The user can easily recover data by using some powerful tools. In Linux, if the user is going to use any tool for recovery like PhotoRec, TestDisk, these requires a small idea for the user about how the file deletion occured? or when the file is deleted? etc.,
TestDisk can recover lost partitions of any file system. PhotoRec is a file data recovery software designed to recover lot of files including video, documents and archives from Hard Disks and lost pictures from digital camera memory(thus, its ‘Photo Recovery’). PhotoRec ignores the filesystem and goes after the underlying data, so it still works even if users media filesystem has been severely damaged or re-formatted.
Both PhotoRec and TestDisk were DOS, Windows(9x,NT,2000,XP,2003), Linux, FreeBSD, NetBSD, OpenBSD, Sun Solaris and MAC OS X compatible. It can be compiled and run on most Linux systems.
PhotoRec Step By Step
This Recovery example guides you through PhotoRec step by step to recover deleted files or lost data from a reformatted partition or corrupted file system. For lost/deleted partitions or deleted files from a FAT or NTFS file system, try TestDisk first – it’s usually faster and TestDisk can retrieved the original file names
Run PhotoRec executable
If PhotoRec is not yet installed, it can be downloaded from TestDisk Download. Extract the files from the archive including the sub-directories.
To recover files from hard disk, USB key, Smart Card, CD-ROM, DVD, etc., you need enough rights to access the physical device.
 Under DOS, run photorec.exe
 Under Windows, start PhotoRec (ie testdisk-6.9/win/photorec_win.exe) from an account in the Administrator group. Under Vista, right click photorec_win.exe and then click Run as administrator to launch PhotoRec.
 Under Unix/Linux/BSD, you need to be root to run PhotoRec (ie.
 sudo testdisk-6.9/linux/photorec_static) Under MacOSX, start PhotoRec (ie testdisk-6.9/darwin/photorec). If you are not root, PhotoRec will restart itself using sudo after a confirmation on your part. Sudo will ask for a password – enter your Mac OS X user password.
 Under OS/2, PhotoRec doesn’t handle physical device, only disk images. Sorry.
To recover files from a media image, run
photorec image.ddto carve a raw disk imagephotorec image.E01to recover files from an Encase EWF imagephotorec 'image.???'if the Encase image is split into several files.photorec '/cygdrive/d/evidence/image.???'if the Encase image is split into several files in the directory d:evidence

 Most devices should be autodetected including Linux software RAID (ie.
 /dev/md0) and file system encrypted with cryptsetup, dm-crypt, LUKS or TrueCrypt (ie./dev/mapper/truecrypt0). To recover files from other devices, run photorec device.Forensics users can use the parameter
/log to create a log file named photorec.log; it records the location of the files recovered by PhotoRec.Disk selection
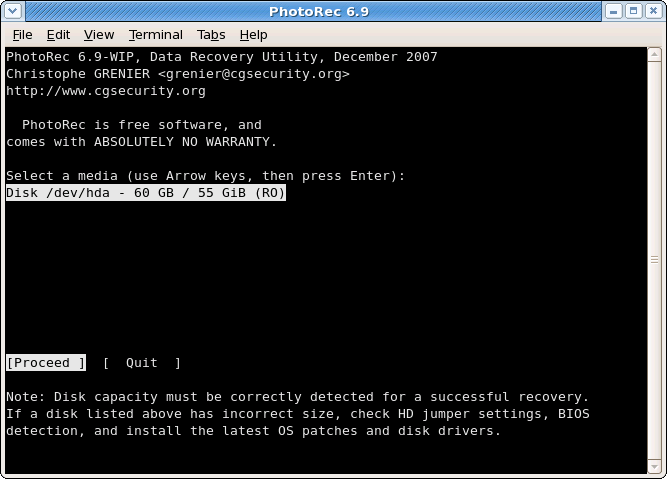 |
Available media are listed. Use up/down arrow keys to select the disk that holds the lost files. Press
Enter to proceed. If available, use raw device
 /dev/rdisk* instead of /dev/disk* for faster data transfer.Partition table type selection
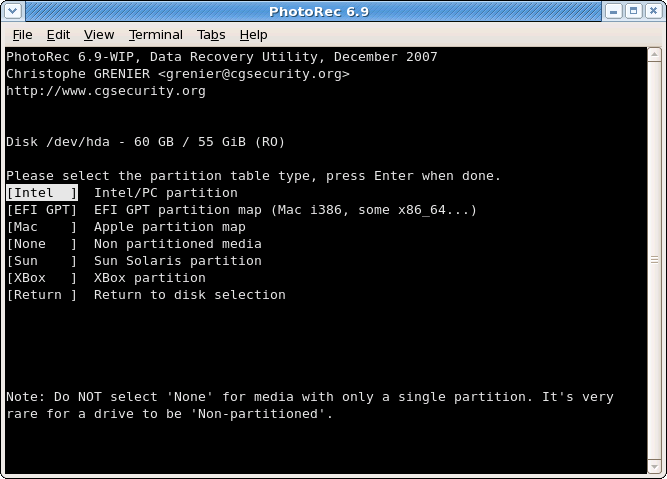 |
Select the partition table type – usually the default value is the correct one as PhotoRec auto-detects the partition table type.
Source partition selection
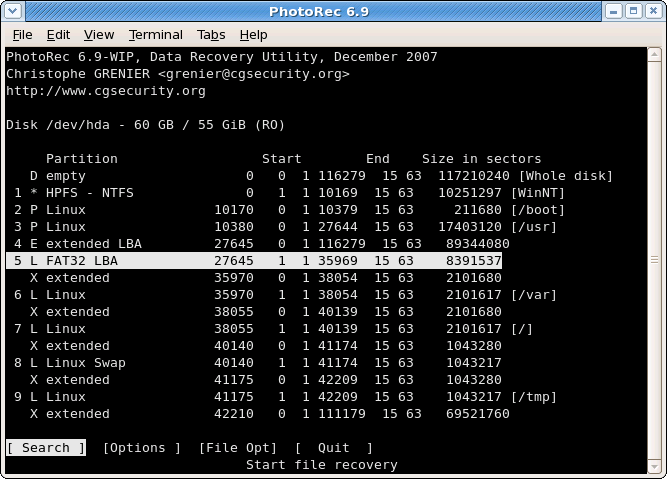 |
Choose
Searchafter selecting the partition that holds the lost files to start the recovery,Optionsto modify the options,File Optto modify the list of file types recovered by PhotoRec.
PhotoRec options
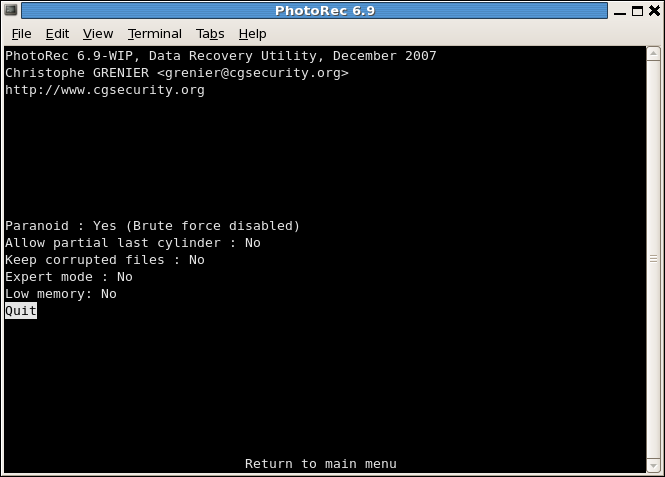 |
ParanoidBy default, recovered files are verified and invalid files rejected.
Enable
bruteforce if you want to recover more fragmented JPEG files, note it’s a very CPU intensive operation.Allow partial last cylindermodifies how the disk geometry is determined – only non-partitioned media should be affected.- The
expert modeoption allows the user to force the file system block size and the offset. - Enable
Keep corrupted filesto keep files even if they are invalid in the hope that data may still be salvaged from an invalid file using other tools. - Enable
Low memoryif your system doesn’t have enough memory and crashes during recovery. It may be needed for large file systems that are heavily fragmented. Don’t use this option unless absolutely necessary.
Selection of files to recover
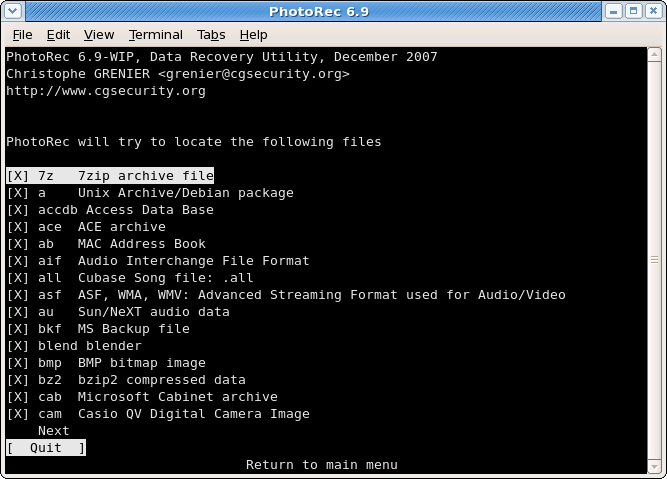 |
In
FileOpts, enable or disable the recovery of certain file types, e.g.[X] riff RIFF audio/video: wav, cdr, avi
...
[X] tif Tag Image File Format and some raw file formats (pef/nef/dcr/sr2/cr2)
...
[X] zip zip archive including OpenOffice and MSOffice 2007
The whole list of file formats recovered by PhotoRec contains more than 320 file families representing more than 200 file extensions.
File system type
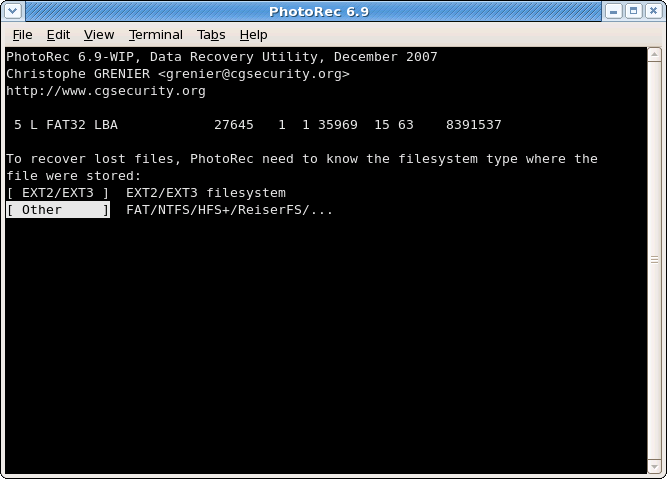 |
Once a partition has been selected and validated with
Search, PhotoRec needs to know how the data blocks are allocated. Unless it’s ext2/ext3 filesystem, choose Other.Carve the partition or unallocated space only
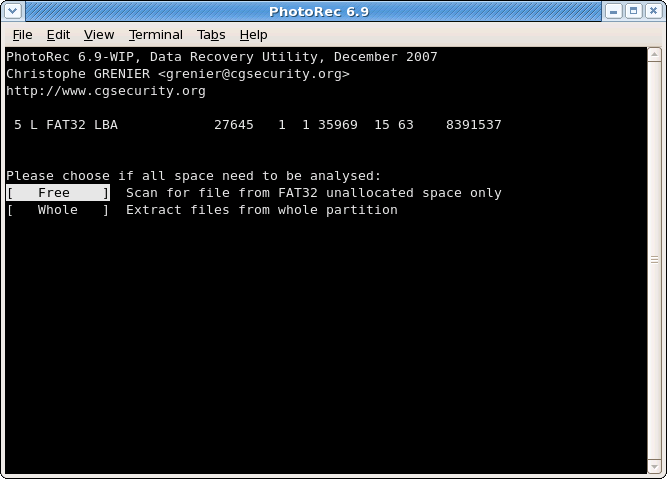 |
PhotoRec can search files from
- from the whole partition (useful if the filesystem is corrupted) or
- from the unallocated space only (available for ext2/ext3/ext4, FAT12/FAT16/FAT32 and NTFS). With this option only deleted files are recovered.
Select where recovered files should be written
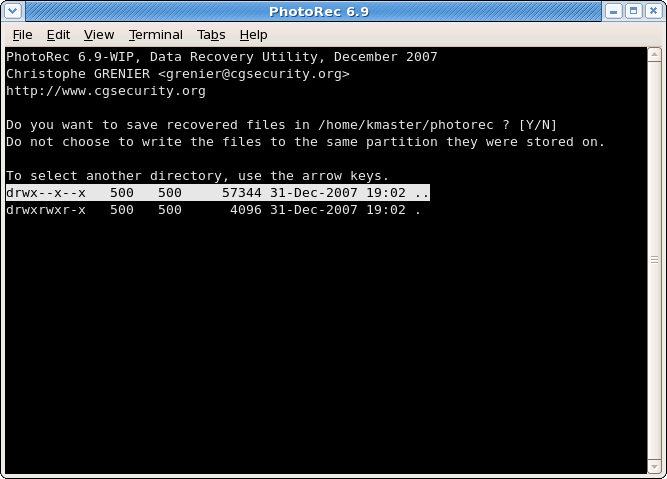 |
Choose the directory where the recovered files should be written.


 To get the drive list (C:, D:, E:, etc.), use the arrow keys to select
 .., press theEnterkey – repeat until you can select the drive of your choice. Validate withYes when you get the expected destination. File system from external disk may be available in a
 /mediaor/mntsub-directory. Partitions from external disk are usually mounted in
 /Volumes.
Recovery in progress
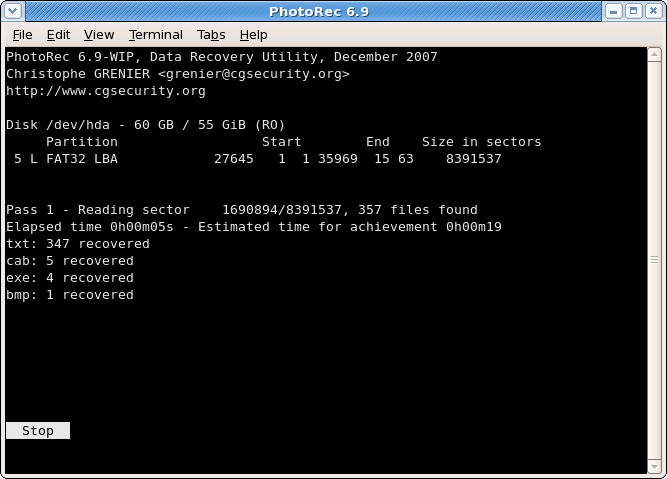 |
Number of recovered files is updated in real time.
- During pass 0, PhotoRec searches the first 10 files to determine the blocksize.
- During pass 1 and later, files are recovered including some fragmented files.
Recovered files are written in recup_dir.1, recup_dir.2… sub-directories. It’s possible to access the files even if the recovery is not finished.
Recovery is completed
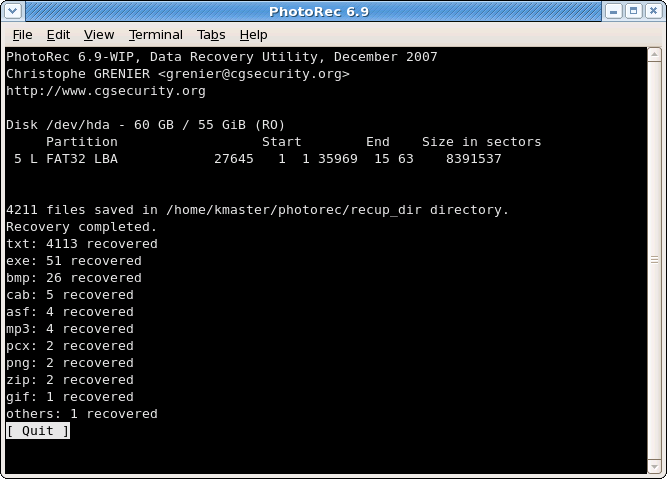 |
When the recovery is complete, a summary is displayed. Note that if you interrupt the recovery, the next time PhotoRec is restarted you will be asked to resume the recovery.


